Saturday, April 22, 2017

Cabinets Installed

Finally got them in for good (I hope)

Nancy packing in more insulation

Left Rear cabinet and rear pantry wall installed - Low-E insulation

Looking forward at the left Rear cabinet and rear pantry wall installed - Low-E insulation

Lying on my back - view of roof vent and right wall of van

Lying on my back - view of roof vent and left wall of van

Lying on my back - view of roof vent and right wall of van after final Low-E application

Completed cabinet install and rear pantry wall


Friday, April 21, 2017

Lots of progress since last post

The big items are now getting done. We finished the upholstery on the walls that will define the sleeping space. We added 2" insulation to the inside of the panels.

3/8 Merante Marine Plywood over 1/2" ISO-foam insulation over 1/2" foam used for floor padding

Work Horse tools next to the back floor inspection port which will allow access for electrical cords when on shore power


2" 3m Thinsulite insulation installed


Adding 2" of Styrofoam to the main sleeping areas. This area needed more insulation, or at least had the space for it.

Nancy adding the finishing touches
Walls complete


Friday, April 14, 2017

April 11th with some progress made

Building the Pantry and the upper rear cabinets

Nice comparison of Ford van sizes - left is a E-350 lwb - right is a max dimensions T350

Professional Stain

Professional clear finish for touch ups. A professional sprayer was used for the main panels
Right wall of pantry and bedframe

Pantry walls - the right one is the front of the bed

Flavio made the upper cabinets

Two upper cabinets with bottoms facing each other

support for the middle of the cabinet

A good way to not lose your vice grips in the wall


Friday, April 7, 2017

Moved to iStorage on April 7th


M

iStorage in Boynton Beach rents spaces for workmen


Just the right size for the van

Supplies to build a van interior

Supplies to build a van interior

Monday, March 20, 2017

Windows Tinted and Nerf Bars installed


The front was done in 35% tint and the windows behind the seats in 20%
Oregon is 35% max to be street legal

Nerf Bar under driver side

Rear Windows were not tinted as these will blocked from inside with Thinsulite custom covers

Product that was used


Thursday, March 16, 2017

Window Installaion


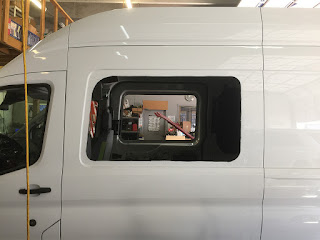
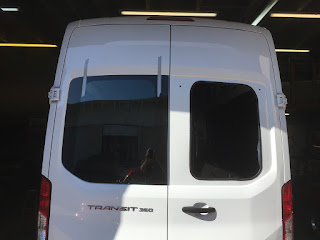
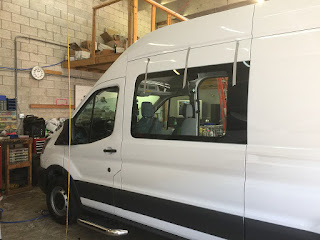
We wanted to add two rear windows and two side windows. One behind the drivers seat and one in the sliding glass door behind the passenger seat.

First - it was very hard to find the part numbers. I finally used Safelite to order the windows from and do the installation. The only issue (issues abound) was that they do not cut the holes. So I had to do that. Not particularly hard but NOT for the faint of heart.

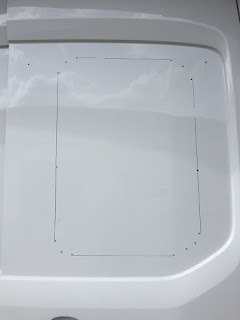
Best tool to use is a Bosch jig saw with very fine (30-35 point teeth I think) saw blade. I tried a sawzall but it is to inaccurate. My advice is to make a pattern and lay it out on the outside using pilot holes lined up by drilling from the inside.

Use tape to protect the finish and make sure you spray silicone on the bottom of the jig saw.

Have at least 3 spare saw blades. Never extract the blade unless it is fully stoppped. Use a sharpie. Measure three times - cut once. Make sure you can see what you are doing. Use safety glasses, ear protection and a dust mask.

Rear windows are different sizes and you use the outside of the raised area. Drill pilot holes and then lay it all out on the outside.

Cut slowly and use a small ladder.

Once done use a file to smooth rough edges and then prime the raw metal.

Safelite had some cool black primer. It dried fast.

We then installed the trim lock edge material to give a finished look. The interior hook was on the inside so the outside was smooth and flat.
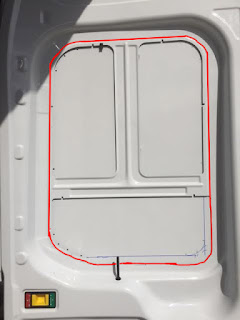
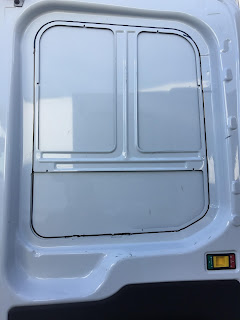
Left Window - do not cut off the lock pull

Right Window

Notice the pilot holes - this is what you use to draw straight lines on tape. The tape needs to define the outside of the hole. This protect the paint. No need to protect inside the line as you are throwing that away.

Completed cut on drivers side

The back windows needed only a single Trim Lock. The sides needed two. One for each sharp metal edge.

One window in - three more to go.

The excess metal tossed away - careful - very sharp

Drivers side glass installed


Roof Top Vent


Some say that installing the roof top vent is almost harder than insulation. They may be right.

I did the install by using these instructions which I have edited for clarity


Tips for the Roof Vent Adapter:
We recommend  Window-weld adhesive which you can get at Napa. 

>> Some use 3M 4200 as well. I think any quality caulk would work well.

Locate and cut the 14 x 14 hole. This is generally between the two frames that are in fact 14" apart. You can use the adapter as a guide to mark the hole. Stay clear of roof supports, obviously. 
Make a tape line 1/4" beyond the adapter perimeter. 
De-gloss the area with a Scotch- brite pad. No need to scuff. Just dull the paint. 
Clean with isopropyl alcohol and let dry thoroughly. Blow dryer if it's wet and/or cold out. 
Apply three (generous) 1/8" beads of the Window-weld on the face of the adapter. Then press the adapter down onto the roof until the adhesive oozes out the sides. (I was not generous enough on my application. It's not necessary to clamp. If you do, use a lot of lightly set clamps and spread out the clamp force over the whole surface area. (I used12 lightweight spring clamps.) 
Using the adhesive that oozes out, make a fillet around the adapter with a double gloved finger. (Just in case one breaks). 
Pull the tape within 15 minutes. Cure is fast on outside. Let cure overnight and then proceed with the fan install. 
(I changed these steps to drill before the butyl tape. )
First Buy REALLY GOOD HIGH QUALITY BITS
Drill two 9/64" pilot holes through the adapter but stop before you cut into the roof.
Then use the 3/32" drill bit to make holes that go all the way through the roof and any frames below.
Now use two screws on the sides (1 1/4") to secure the flange and drill the rest of the holes.
Again use the 9/64" to make pilot holes and then 3/32" to drill through the metal.
Then use the 9/64" bit from below to open up the 3/32" holes where they penetrate the roof ribs. STOP before you drill through the actual roof. A stop bit, if you can find one, will work. 
and into the van roof. Only where you are into a roof support beam should you drill a clearance hole in the beam. You only want the screw to engage the adapter and outer skin. The screw attaches to the metal roof only and that hole has to be 3/32"
You will need longer screws, I used 1 1/4" screws for the sides that are parallel to the sides of the van. The 1" screws (provided with the Maxx Air 7000 fan) were fine for the front and back of the flange.

I used the recommended butyl tape for the fan install. I covered the fan flange with 1 1/8" wide tape. Placed the flange onto the adapter and pressed down. 

Then tighten the screws very lightly against the fan flange. Some butyl will ooze out which you can trim off. 

After all screws are in coat the fan flange adapter and onto the roof about 1/2" with brush on bed-liner or Flexseal from the TV guy works well. Some sealants will melt the fan plastic so you might try it on a portion of the interior bezel first. You'll cut a lot of that piece off. Good idea to check the integrity and reapply the sealant every so often. 
Dicor self leveling sealant also works but looks a little messy.

Roof van flange installed on the Impact 3D Shim. I used 3/32" to pre-drill the roof for the #10 screws
I used 9/64" drill bit to clearance drill the Transit Roof machined shim from Impact 3D

Roof fan installed
 I had to ask for more screw from Maxair for the sides of the van ( 4 screws) that were supposed to attach the fan to the flange.